One Possible Diagram
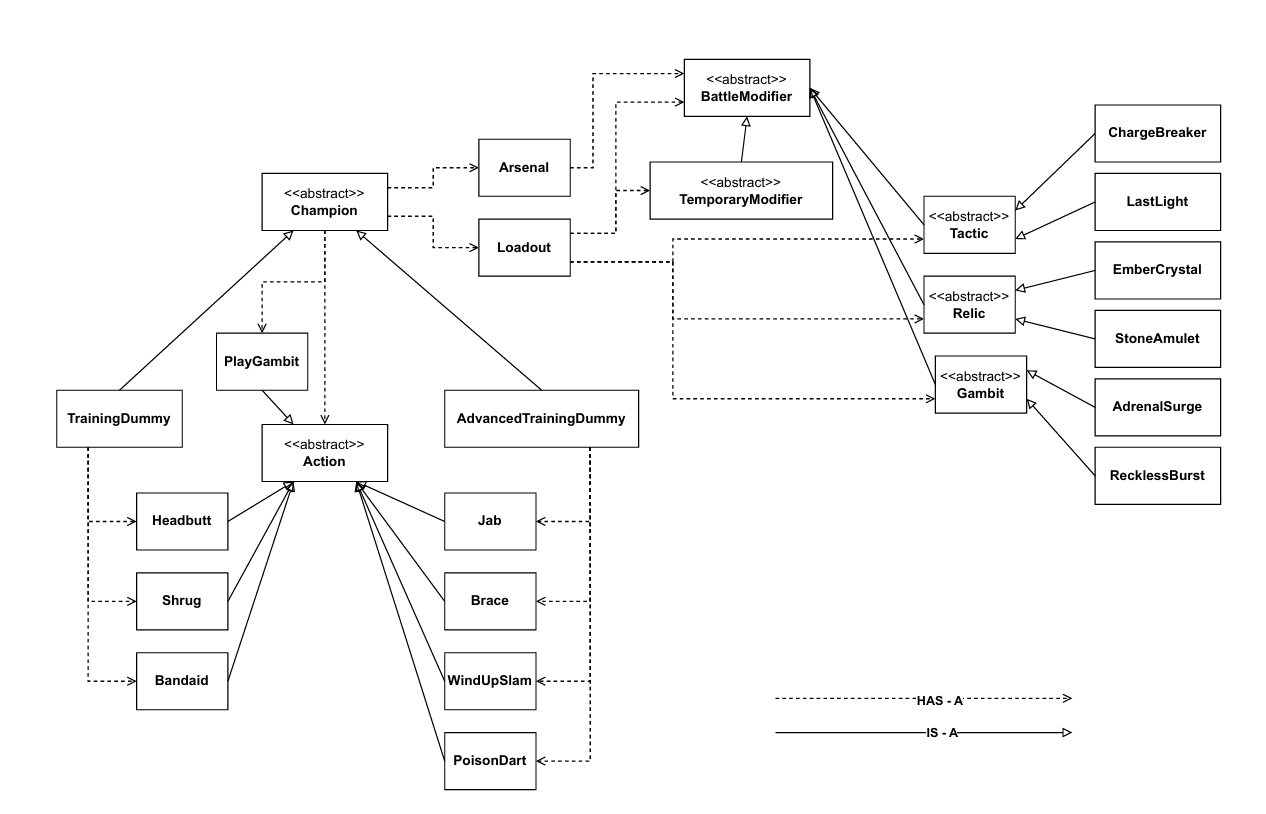
Your diagram should help you figure out where your own Champion and abilities will fit into the system. Your diagram may be different from this one, and that's okay!
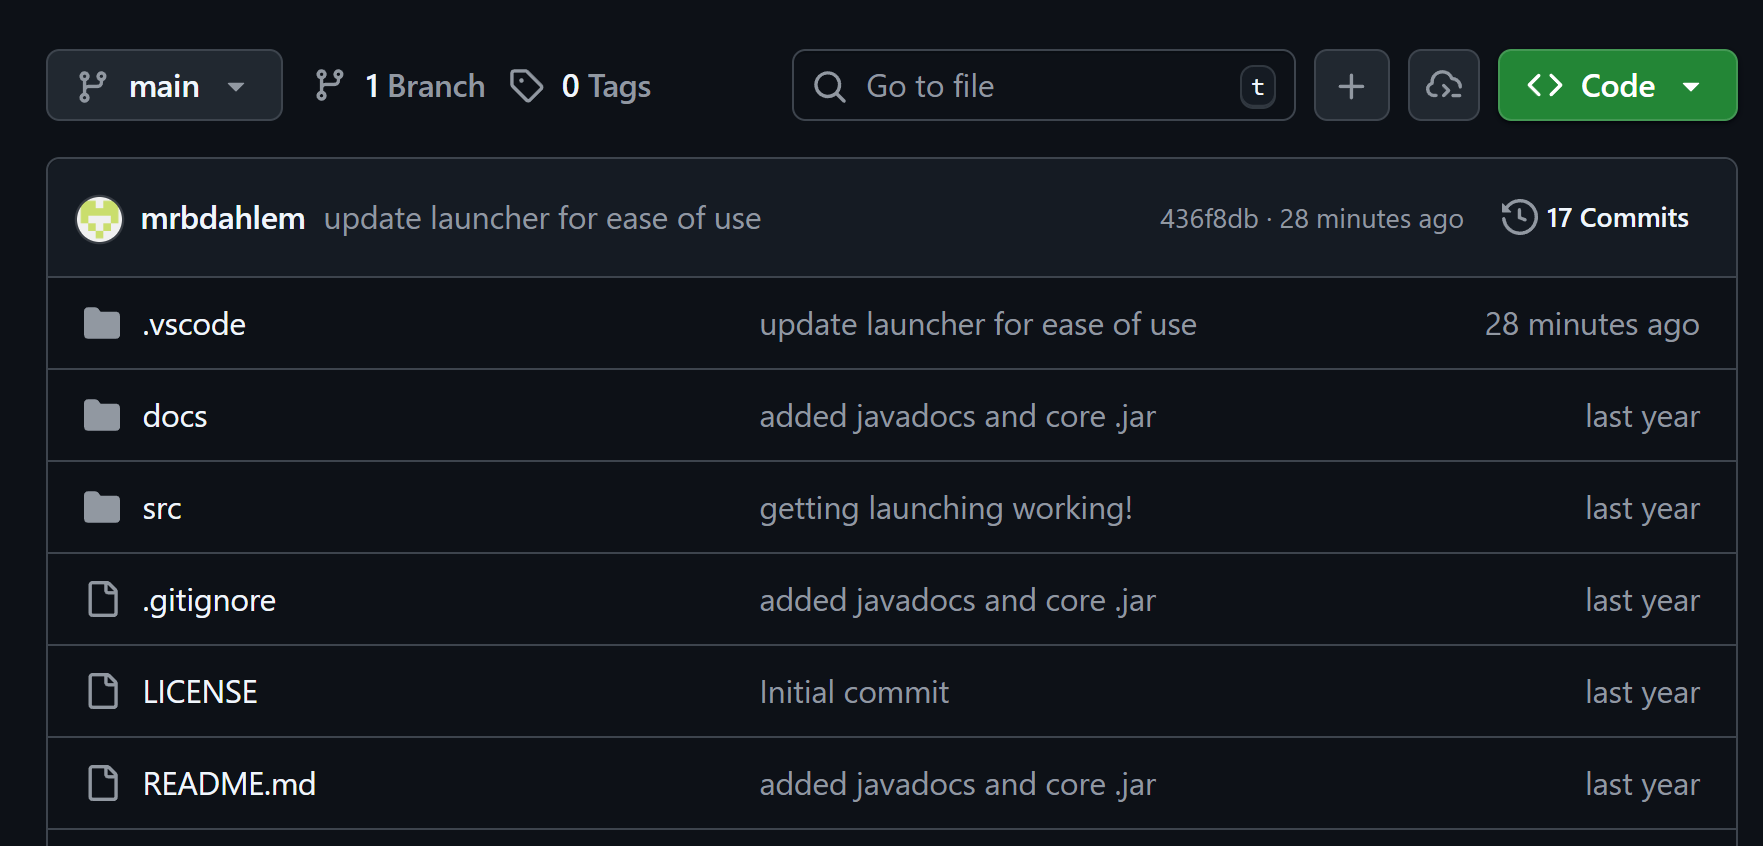
Cloning Your Repository
When you have your repository open on GitHub, you will see all of the files it contains.
Next you will make a local clone of this repository on your computer so you can write and run code.
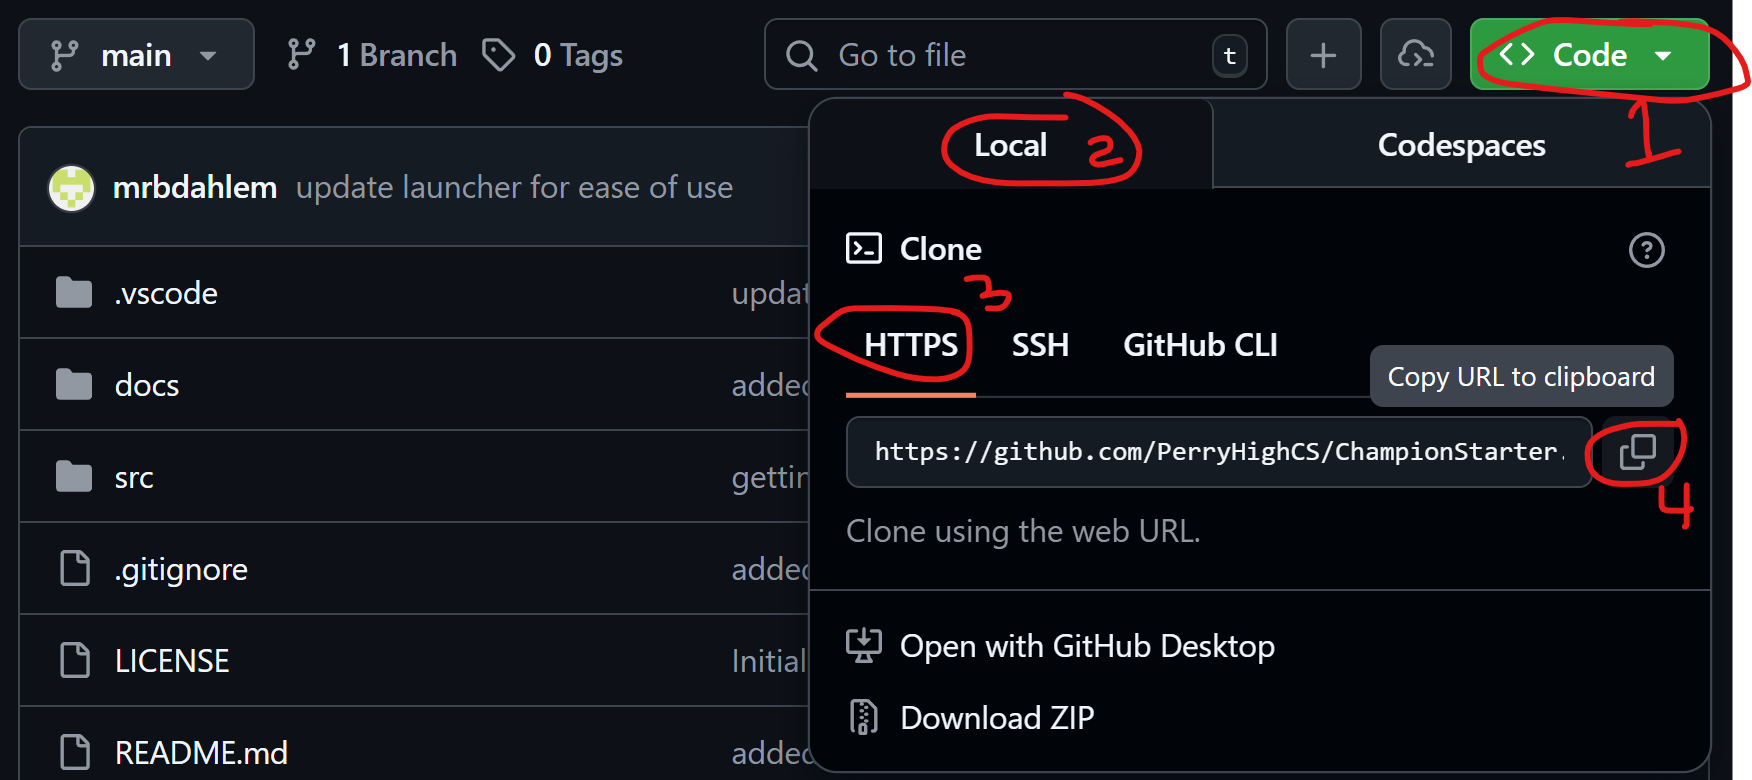
Cloning Your Repository
- Click the green < > Code button on your repository page.
- Make sure the Local tab is selected.
- Make sure HTTPS is selected.
- Click the
 Copy URL To Clipboard button.
Cloning Your Repository
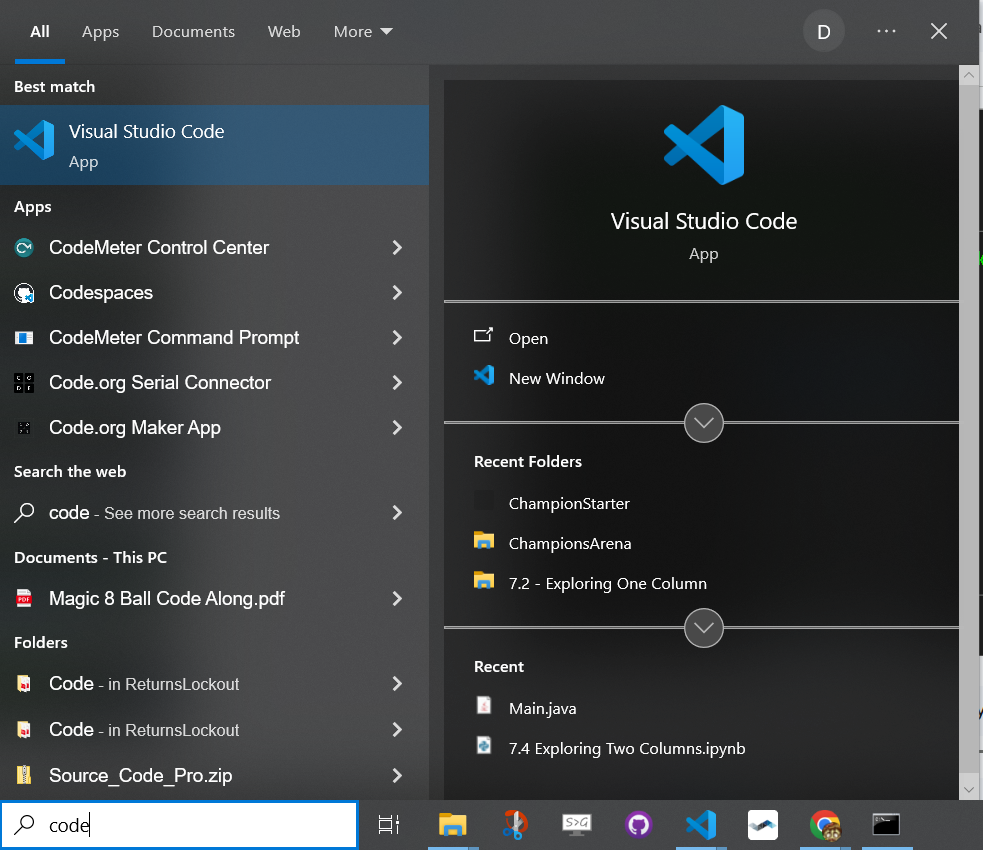
- Press the ⊞ Windows key.
- Type
code. - Select Visual Studio Code from the results.
Cloning Your Repository
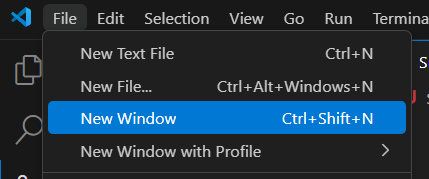
If VS Code already has a project open, choose New Window from the File menu to get a fresh empty window.
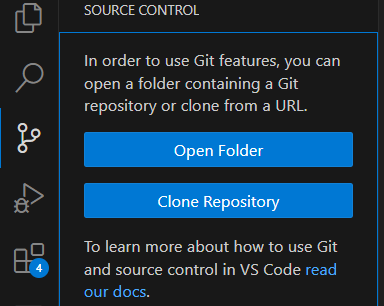
Then open the Source Control panel by clicking the  Source Control button
on the left sidebar.
Source Control button
on the left sidebar.
Cloning Your Repository
In the Source Control panel, click the Clone Repository button. A popup will appear at the top of your screen.
Paste the URL you copied from GitHub into the box and press Enter.

Cloning Your Repository
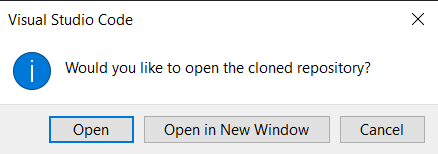
A dialog will open so you can choose where to save the cloned repository. The Documents folder is a good choice. When cloning finishes, VS Code will ask if you want to open it. Click Open.
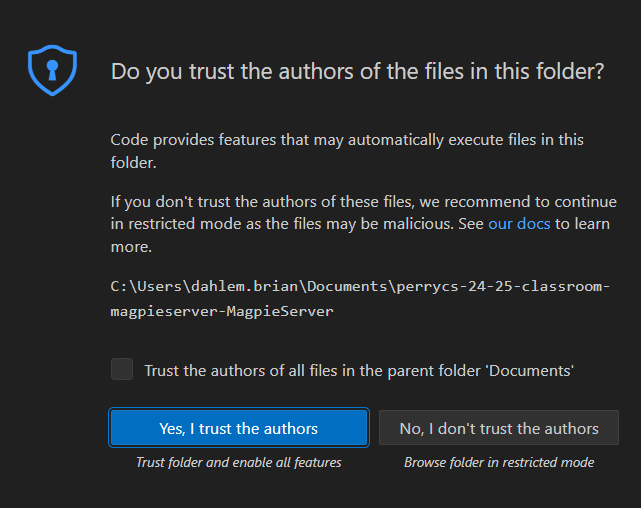
You will then be asked if you trust the authors of the files in the folder. Click Yes, I trust the authors so you will be able to run the code you write.
Working With Your Repository
When you modify files, the  Source Control button on the sidebar shows a badge
with the number of changed files.
Source Control button on the sidebar shows a badge
with the number of changed files.

Opening the Source Control panel lets you see those changed files. From there you can open the file, discard the changes, or stage the changes to include in a commit.
Committing Changes to Your Repository
As you build your Champion, commit whenever you have a working feature or meaningful progress; do not wait until everything is done.
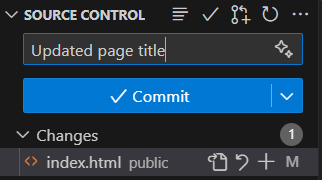
At the top of the Source Control panel, type a commit message explaining what you changed, then click Commit.
Committing: Common Hiccups
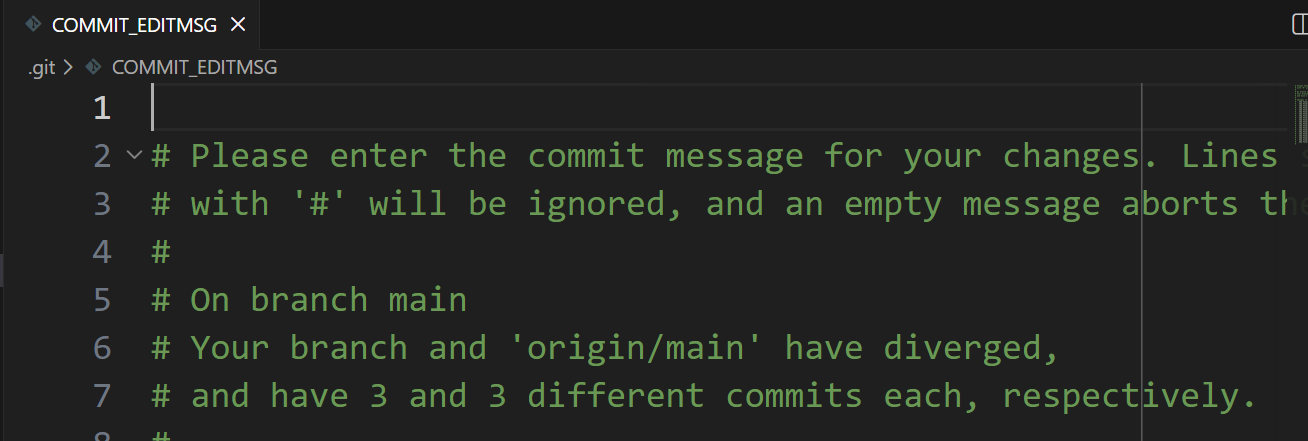
If you forgot to type your commit message in the box, a new editor tab pops up asking for a commit message. Type your message at the top of the tab, press Ctrl-S to save, then close the tab.
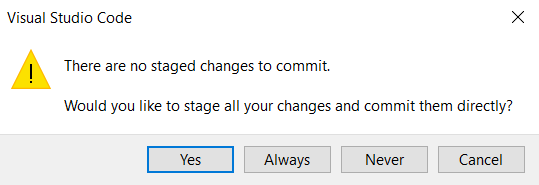
If VS Code says you have no staged changes, it means you did not tell it which files to include in the commit. Since you probably want to include all changed files, click Yes to stage and commit everything.
Committing: Another Common Issue
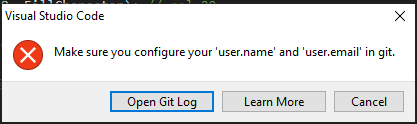
If you see an error about needing to configure user.name and user.email,
you need to tell git who you are before it will accept commits.
Press Ctrl-` (the backtick key next to 1 in the top-left of your keyboard) to open a Terminal.
Then run these two commands, substituting your own email and name:
git config --global user.email "your github email"
git config --global user.name "your name"
Then try committing again.
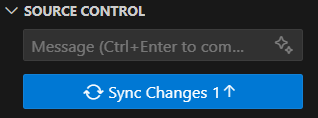
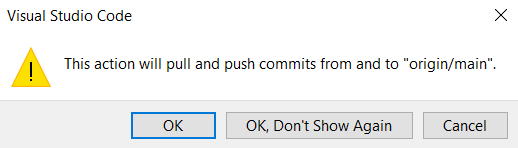
Syncing Your Repository
After committing, the Source Control panel will show a Sync Changes button.
Clicking this button will push your files to GitHub and pull down any changes that were made elsewhere.
Click Sync Changes then OK when the confirmation message appears.
Working With Your Repository
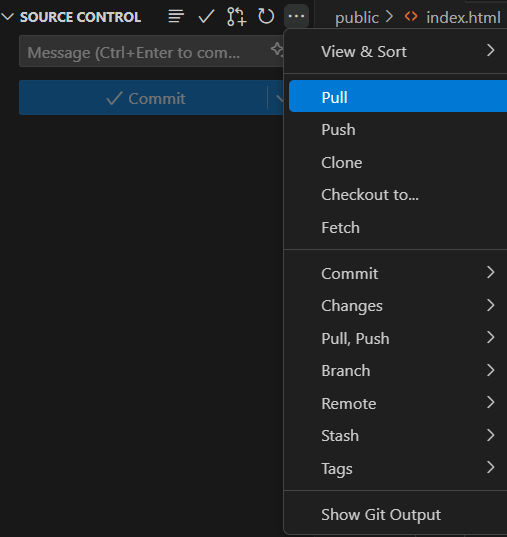
The Source Control panel also gives you access to more advanced git operations through the ⋯ (three dots or kabob) menu at the top of the panel.
From there you can pull changes from another computer, push manually, branch to isolate changes, and much more.
Get comfortable committing and syncing regularly. Your repo is your backup.